Progression guide for items and bosses

This guide is a walk-through for the necessary order of crafting and biome progression and suggested order of defeating bosses. It might be useful for new players planning ahead, or those checking back for content they've missed.
Standard type character is strongly recommended over hardcore, for all players. It is also recommended that new players start in a normal mode world. Hard mode currently doubles the health and damage of all enemies and bosses, for little to no pay-off. This requires highly optimised play, making use of all the best available gear, consumables and skill tree talents. Or an extreme degree of caution and cheesing the bosses.
Players can farm most skills with various AFK methods, to gain earlier advantage from some stronger buffs and useful talents. However, this is unnecessary in a normal playthrough. Especially since skill levelling was made substantially quicker in the 0.5 Desert Update.
Permanent max health foods have also been omitted. They are rare to find optional extras that will help make a playthrough easier by slightly increasing a character's base health.
This is not an achievements guide, but working through all the sections below could bag about half of them.
Boss order and world exploration are theoretically quite flexible, given this is a sandbox game. There is currently only one solid gate to progress: defeating the first 3 bosses. Which separates this guide into two parts.
Part 1: Powering up The Core[edit]

In the first part of the game, the goal is to power up The Core. This is done by activating all three boss statues connected to it. Each is associated with one of the first three bosses. Defeating that boss will drop an essence necessary to activate their statue: ![]() Glurch Eye,
Glurch Eye, ![]() Ghorm's Horn, and
Ghorm's Horn, and ![]() Stolen Crystal Heart.
Stolen Crystal Heart.
These three Boss fights can be attempted in any order, as soon as each boss is found. They're all pre-spawned at set distances in the world. Players may chose to prepare more by progressing through these first 4 tiers of equipment based on the materials found in the initially accessible biomes.
But beating bosses also drops good items, unlocks gear, weapons and other things that make it easier to explore and deal with randomly spawned enemies; the statues also act like a crafting workbench, each offering up 3 additional items to craft.
Crafting and Items[edit]
The workbenches chain from one to the next, as players progress through biomes and their ores. There is no requirement to beat bosses, initially.
The Core:  Wood[edit]
Wood is easily obtained immediately from first spawn at The Core, in the centre of The Undergrounds, by destroying Roots. Which are also found in most successive biomes.
| In hand crafting (by opening main inventory): |
|---|
The Undergrounds:  Copper Ore[edit]
Copper Ore is mined from The Undergrounds' walls that sparkle in the darkness. Plenty of wood is also required, from exploration and/or farming roots.
The Clay Caves:  Tin Ore[edit]
Tin Ore is mined from sparkling Clay Blocks. The Clay Caves biome surrounds one half of The Undergrounds, beyond ~150 tiles from the core, at a random angle. Many items still require e.g. Wood or Copper Bar. Fiber can be looted from enemies and breakables in the biome, salvaged from spare gear, or harvested from the plant of the Grub Kapok Seed. Some Gold Ore may also be found, ready for the next tier of crafting.
The Forgotten Ruins:  Iron Ore[edit]
Iron Ore is mined from Stone Blocks and occasionally dropped by enemies in The Forgotten Ruins biome. This grey area is found on the opposite side to The Clay Biome, together fully surrounding The Undergrounds. Gold Ore, found in both stone and clay biomes, Iron Ore and Wood are also needed for crafting.
The Ruins' cities are a top tier source of ![]() Ancient Gemstone and
Ancient Gemstone and ![]() Mechanical Part, key for crafting valuable items throughout the next phase of progression. They are dropped from the dangerously coordinated Caveling Enemies and plentiful Large and Small Destructible Ancient Objects.
Mechanical Part, key for crafting valuable items throughout the next phase of progression. They are dropped from the dangerously coordinated Caveling Enemies and plentiful Large and Small Destructible Ancient Objects.
Bosses[edit]
| Name | Notes | NPC |
|---|---|---|
 Glurch the Abominous Mass |
Found in The Undergrounds at a range of 60 tiles from The Core. Recommend full copper gear with food buffs or tin gear, see strategy guide. Glurch Eye unlocks the Glurch statue. This is used to craft the boss scanners for Ghorm and Malugaz. Glurch also drops |
|
 Ghorm the Devourer |
Found circling through The Clay Caves and The Forgotten Ruins, around an orbit at a range of 230 tiles from The Core. Players may want full Iron tier gear before fighting: strategy guide. Ghorm's Horn unlocks Ghorm statue, which allows crafting of |
|
 Malugaz the Corrupted |
Summoned placing a
Stolen Crystal Heart unlocks Malugaz' statue. |
Optional bosses[edit]
These bosses are both tough, so should be fought after acquiring gear from the Wilderness.
 The Hive Mother |
Found in the main Larva Hive Biome dungeon in The Clay Caves at a range of 330 tiles from The Core. It is strongly suggested to explore this sub-biome and fight her after completing crafting tier progression through Iron. Hive Mother strategy guide. |
 King Slime |
Spawned by placing a
Drops |
Part 2: Gathering titan souls[edit]

After powering up The Core, the player interacts to talk through a dialogue until they unlock their Souls tab and are imbued with the ability to drop The Great Wall.
In multiplayer, every player must talk to The Core, separately, to unlock their own Souls tab.
After travelling out to touch and drop the unbreakable barrier wall, players can return to speak to The Core for a second time. This yields a brief description and approximate compass direction for the first outer biome: Azeos' Wilderness.
Scanners can be crafted at their respective Ancient Shrine. Each of these marks the exact location of an outer biome boss spawn. Each scanner recipe uses a resource unique to the boss's biome. Either found on the ground or as a mob drop.
Unlike the first 3 core progression bosses, each Titan boss must be summoned before it can be fought for the first time. All 3 have consumable summoning items, also crafted at the ![]() Ancient Hologram Pod, housing the Spirit Merchant. Each summon requires an amount of that biome's unique ore, smelted. So mining the walls or boulders is a requirement.
Ancient Hologram Pod, housing the Spirit Merchant. Each summon requires an amount of that biome's unique ore, smelted. So mining the walls or boulders is a requirement.
Because access to all 3 outer biomes is given simultaneously, these infinite biomes can, in theory, be attempted in any order. As can their respective Titan bosses. But it's strongly suggested to take them on in the order listed below, due to the workbench upgrade chain, mining damage and mob and boss difficulty scaling.
Upon defeating them for the first time, each of the 3 titan bosses gives the player a unique new soul power ability: ![]() Soul of Azeos,
Soul of Azeos, ![]() Soul of Omoroth and
Soul of Omoroth and ![]() Soul of Ra-Akar. Once a power is collected, the boss's sigil is added to the Souls tab of the character screen. Each sigil can be clicked to toggle that ability on or off.
Soul of Ra-Akar. Once a power is collected, the boss's sigil is added to the Souls tab of the character screen. Each sigil can be clicked to toggle that ability on or off.
In action, each ability resembles one of the boss's attacks. They are triggered at random, by doing damage to any creature (including NPCs), potentially causing additional damage. Making them most useful against groups of mobs or bosses, that take many hits.
Part 2.1: Azeos' Wilderness[edit]
 Scarlet Workbench[edit]
![]() Scarlet Ore is mined from the tough Grass Blocks and processed into bars using the Smelter Kiln, to craft:
Scarlet Ore is mined from the tough Grass Blocks and processed into bars using the Smelter Kiln, to craft:
| Item | Notes |
|---|---|
| Step up mining and digging damage, while the Scarlet Hoe has a 3x3 tile area, currently the best. | |
| For crafting | |
| Enables automation of several tasks by crafting:
| |
| Crafts more powerful potions, like | |
| Allows crafting keys to open all locked chests found while mining walls. From Copper Chests on up. | |
| Crafts the basic |
Additional Items[edit]
Legendary items are entirely optional and potentially very time consuming to assemble.
[Legendary] |
Illusive materials for this legendary sword are found in unique Wilderness and/or Forgotten Ruins scenes. These instances are dynamically spawned into the world by exploration, causing many players difficulty. See this guide: How to Get the Rune Song. |
| Mold Biome [Sub-biome] |
|
Bosses[edit]
| Name | Notes | NPC |
|---|---|---|
 Azeos the Sky Titan |
Summoned in Azeos' Wilderness, at a range of 600 tiles from the core, using
Drops: |
|
 Ivy the Poisonous Mass |
[Optional] Found in Azeos' Wilderness at a range of 900 tiles from the core. Drops | |
Part 2.2: The Sunken Sea[edit]
 Octarine Workbench[edit]
![]() Octarine Ore is mined from Limestone Walls and Ore Boulders on islands, then smelted to craft:
Octarine Ore is mined from Limestone Walls and Ore Boulders on islands, then smelted to craft:
| Name | Notes |
|---|---|
| Incrementally improved equipment. | |
| Crafts | |
| For crafting more advanced necklaces and rings. Note: the Jewelry crafter talent, at the end of the crafting skill tree, allows players to make polished versions of craftable jewellery with up to double their regular buff stats. | |
| Crafted at significant expense, players can teleport between Portals placed anywhere in the world. Greatly speeding up returning to key locations. | |
| 3rd tier of ore processing automation, ready for the next biome. |
Additional Items[edit]
[Legendary] |
The crafting materials for this Legendary bow are found in the 3 large Forlorn Metropolis and the Vault, all within The Sunken Sea. Full guide: How to Get the Phantom Spark Legendary Bow. |
| Forlorn Metropolis [Sub-biome] |
|
| Boat for faster water travel. Crafted at the Boat Workbench using Coral planks and Octarine Bars. |
Bosses[edit]
These are both very difficult boss fights that are better to be well prepared for:
| Name | Notes |
|---|---|
 Omoroth the Sea Titan |
Summoned by fishing, with Drops |
 Morpha the Aquatic Mass |
[Optional]
Found in The Sunken Sea at a range of 1400 tiles from the core. |
Part 2.3: The Desert of Beginnings[edit]
 Galaxite Workbench[edit]
![]() Galaxite Ore is mined from some Sandstone Walls and Galaxite Ore Boulders, mostly found inside those walls, too. Its crafted into Galaxite Bars via the Fury Forge.
Galaxite Ore is mined from some Sandstone Walls and Galaxite Ore Boulders, mostly found inside those walls, too. Its crafted into Galaxite Bars via the Fury Forge.
| Name | Notes |
|---|---|
| Incrementally improved equipment. | |
| Crafts | |
| Crafts |
Additional Items[edit]
[Legendary] |
This Legendary pickaxe is crafted at the Ancient Forge, found at a range of 1600 tiles from The Core. Using Cipher Parchment (dropped by Igneous) and Ancient Pickaxe (e.g. dropped by Azeos). |
| This epic 3-piece armor set has a quest equivalent in scope to that of the Phantom Spark. Each of its items is locked in a unique chest in the Titan Temple scene. The unique key for each of these is found in Desert scenes at different radii from The Core: Prince, Queen and King Maze Dungeons. Which are filled with traps. | |
| Is an offhand item giving a large damage buff to all players. It's crafted from Crystal Meteor Shards from the Crystal Meteor scene in the Desert. |
Bosses[edit]
| Name | Notes |
|---|---|
 Ra-Akar the Sand Titan |
Summon by using
Drops: |
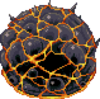 Igneous the Molten Mass |
[Optional]
Found in The Desert of Beginnings at a range of 1400 tiles from The Core. Drops: |
Part 3: Gathering more titan souls[edit]
Bosses[edit]
| Name | Notes |
|---|---|
 Druidra the Wild Titan |
|
 Crydra the Ice Titan |
|
 Pyrdra the Fire Titan |
Part 4: Endgame[edit]
Bosses[edit]
| Name | Notes |
|---|---|
 Core Commander |
|
 Urschleim |
[Optional] |