Mining
Mining encompasses breaking walls in the course of exploring the world. Or, more specifically, to loot metal ore materials from blocks. Ore Boulders become a much more plentiful source of ore later in game progression, once Drills are available.
Skill Tree[edit]
Mining experience is gained by dealing mining damage to a wall with a pickaxe or melee hit (punch). Unbreakable walls, or those the player is not able to damage, will not award experience points. Walls that are broken too slowly will not award any experience.
Each mining skill level increases your mining damage by 1, for up to +100 at level 100. Every fifth level awards a skill point that can be allocated in the mining talent tree. Populating it from the top:
 Efficient excavation +2-10% mining damage |
|||
 Meticulous miner +5-25% chance to gain an additional ore from walls containing ores |
 Self-mending alloy Gain +2-10 durability on your tool when breaking walls containing ores | ||
 Miner's strength +2-10% of mining damage added as melee damage |
 Mine, mine, mine! +3-15% mining speed |
 Explosives engineer +4-20% explosives damage | |
 Pick and run! +4-20% movement speed boost for a short duration after mining a wall |
 Archaeologist +0.2-1% chance to drop a valuable item from any mined wall | ||
Walls[edit]
Each wall type first deducts a flat amount of mining damage from each strike. Any damage beyond that threshold is then subtracted from the wall's health. So, with Grass walls, for example, a player will need to have a mining damage stat of over 166 before doing any damage to a wall with a pickaxe.
Striking a wall that is too tough to damage will made a different, gong-like sound, and knock the player back on the first hit.
Melee attacks on walls do not receive this deduction. So, players can always punch through any breakable wall, given sufficient time.
However, to gain experience from striking a wall, a player's mining damage must be 12 above a wall's damage reduction stat. Including for melee hits. So, 178 for grass walls.
Walls will begin to self-heal after taking no damage for 5 seconds.
| Sprite | Name | Health | Mine damage reduction | Mine damage requirement threshold |
|---|---|---|---|---|

|
Dirt Block | 150 | 1 | Experience gain: 13 or higher Sharp sound effect: 13 or higher |

|
Turf Block | 150 | 1 | Experience gain: 13 or higher Sharp sound effect: 13 or higher |

|
Sand Block | 8 | 1 | Experience gain: 13 or higher Sharp sound effect: 1 or higher |

|
Clay Block | 287 | 26 | Experience gain: 38 or higher Sharp sound effect: 49 or higher |

|
Stone Block | 445 | 81 | Experience gain: 93 or higher Sharp sound effect: 118 or higher |

|
Larva Hive Block | 445 | 244 | Experience gain: 256 or higher Sharp sound effect: 281 or higher |

|
Grass Block | 617 | 166 | Experience gain: 178 or higher Sharp sound effect: 217 or higher |

|
Mold Block | 706 | 660 | Experience gain: 672 or higher Sharp sound effect: 718 or higher |

|
Limestone Wall | 798 | 281 | Experience gain: 293 or higher Sharp sound effect: 347 or higher |

|
City Wall | 892 | 1050 | Experience gain: 1062 or higher Sharp sound effect: 1124 or higher |

|
Sandstone Wall | 988 | 426 | Experience gain: 438 or higher Sharp sound effect: 508 or higher |

|
Temple Wall | 988 | 767 | Experience gain: 779 or higher Sharp sound effect: 849 or higher |

|
Maze Block | 988 | 1279 | Experience gain: 1291 or higher Sharp sound effect: 1361 or higher |

|
Lava Rock Block | 1086 | 1224 | Experience gain: 1236 or higher Sharp sound effect: 1314 or higher |

|
Wood Wall | 150 | 1 | Experience gain: 13 or higher Sharp sound effect: 13 or higher |

|
Paintable Wall | 287 | 26 | Experience gain: 38 or higher Sharp sound effect: 49 or higher |

|
Stone Bricks Wall | 445 | 81 | Experience gain: 93 or higher Sharp sound effect: 118 or higher |

|
Scarlet Wall | 617 | 166 | Experience gain: 178 or higher Sharp sound effect: 217 or higher |

|
Coral Wall | 798 | 281 | Experience gain: 293 or higher Sharp sound effect: 347 or higher |

|
Galaxite Wall | 988 | 426 | Experience gain: 438 or higher Sharp sound effect: 508 or higher |
Pickaxes[edit]
- Main article: Pickaxes
Pickaxes are tools used for mining walls more efficiently than melee attacks. This is thanks to their substantial mining damage stats. However, bonus mining speed (e.g. with the Ancient Pickaxe) may be more useful than higher damage, against walls that take one hit, either way.
| Sprite | Name | Mining damage | Durability | Acquisition |
|---|---|---|---|---|
| Wood Pickaxe | 15 | 200 | Crafted by hand | |
| Copper Pickaxe | 39 | 400 | Crafted with Copper Workbench | |
| Tin Pickaxe | 83 | 550 | Crafted with Tin Workbench | |
| Iron Pickaxe | 167 | 800 | Crafted with Iron Workbench | |
| Scarlet Pickaxe | 282 | 800 | Crafted with Scarlet Workbench | |
| Ancient Pickaxe | 354 | 800 | Dropped by Azeos the Sky Titan | |
| Octarine Pickaxe | 403 | 800 | Crafted with Octarine Workbench | |
| Galaxite Pickaxe | 556 | 800 | Crafted with Galaxite Workbench | |

|
Solarite Pickaxe | 715 | 800 | Crafted with Solarite Workbench |
| Soul Seeker | 769 | Unbreakable | Crafted with Cipher Parchment |
Skill Farming[edit]
Mining is significantly quicker to level up, since the 0.5.0 Desert update. However, these AFK strategies can still be used to speed progression. They both rely on hitting walls for 1xp per hit, not breaking them.
Punching on the spot[edit]
- Grab a stack of wall block items.
- Ensure character's mining skill, without pickaxe selected, is more than 12 higher than the damage reduction stat for that wall type (listed above).
- Surround character with walls, to be safe from mobs.
- Face sideways and hold down both use and attack buttons (LMB and RMB by defult - can be rebound).
- This should automatically place a new block each time you eventually break one by punching.
- Then, for an AFK session, either weight down your buttons, create a macro or use an auto-clicker program to keep these actions going indefinitely.
- Optimise character build for melee speed.
Minecart loop[edit]
- Place down Rail to create a loop of track greater than 80 tiles long.
- Aim for it to travel almost entirely horizontally or vertically (one or the other).
- Have a 1 tile gap in the middle, to fill with wall blocks.
- Also add blocks along the side you will be facing, at right angles to the plane of travel.
- So you can be punching these blocks most of the time, with only rare hits on the Minecart track, where it turns.
- The length will prevent the player from ever making successive hits on the same tile of track, within the 5 seconds before object damage self-heals.
- Make sure your mining damage is setup so you cannot one-hit your blocks.
- AFK with attack button held down, or other method of choice.
- Walls should never break, so don't need to be replaced.
Ore Boulders[edit]
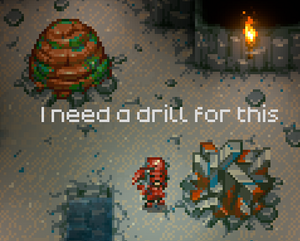
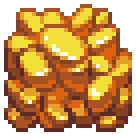
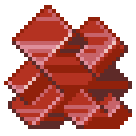
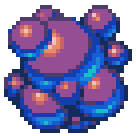
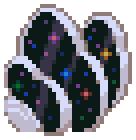
Ore Boulders are metal resource nodes 2x2 tiles in size. These rocks of solid ore can only be mined using Drills powered by Electricity Generators or Levers. They are unbreakable with pickaxes or other tools.
Each boulder always yields a total of 1800 ore of its respective metal type. This takes many hours to fully extract with 8 drills, and longer still with fewer than that. However, drills continue to work everywhere in the world, regardless of player distance.
Types and locations[edit]
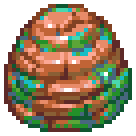
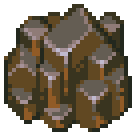
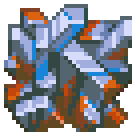
Ore Boulders are environmental objects that are almost all spawned randomly by world generation, during player exploration and such. There is a far higher, or exclusive, chance for them to appear in their native biome areas. I.e. along with their manually mined ore types. Spawn chance tiers (in table below): "Frequent" = 1 in 333 tiles, "Common" = 1/1000, "Rare" = 1/2000, "Very Rare" = 1/10'000 (or less).
|
|
|
|
|
|
| |
| Biome | Copper | Tin | Iron | Gold | Scarlet | Octarine | Galaxite |
|---|---|---|---|---|---|---|---|
| Dirt | Frequent | None | None | None | None | None | None |
| Clay | Common | Frequent | None | Common | None | None | None |
| Stone | Common | Rare[1] | Frequent | Common | None | None | None |
| Wilderness | Rare | Rare | Rare | Very Rare | Frequent | None | None |
| Sea | None | None | None | None | None | Frequent | None |
| Desert | Very Rare | Very Rare | Very Rare | Very Rare | None | None | Rare[2] |
| Map color | #ad7466 | #847b75 | #888fa6 | #c5bb66 | #995f55 | #7e68b7 | #f7f0dc |
| Ore | |||||||
| Smelter | |||||||
| Smelt Time | 7s | 12s | 17s | 22s | 27s | 32s | 32s |
| Bar | |||||||
| Bars/hour | 514 | 300 | 212 | 164 | 133 | 113 | 113 |
The first 3 ore types can only be processed into bars with a Furnace. The next 3 ores with a Smelter Kiln and Galaxite with the Fury Forge. Each tier of ore takes 5 seconds longer to smelt than the type before, except Galaxite. This means that automated mining setups may need additional Smelters to keep up with the same rate of ore production from the higher tier boulders.
Depletion time[edit]
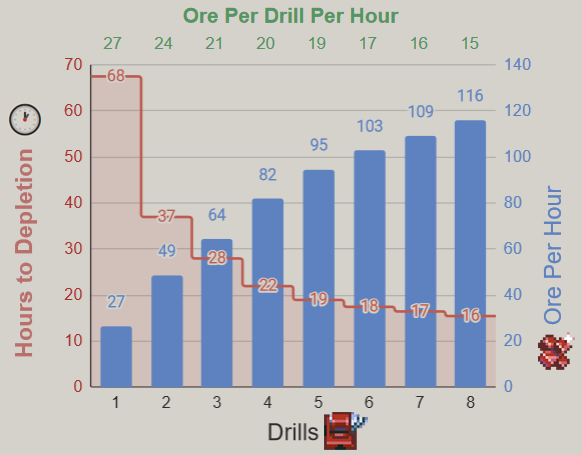
There is a diminishing return for each additional drill on a boulder, in terms of reducing the time per ore extracted. The effective amount of ore per drill drops from 27 per hour (with 1 drill) down to 15 per hour (with 8 drills). However, the total ore produced per boulder will always be 1800.
| 1 | 2 | 3 | 4 | 5 | 6 | 7 | 8 | |
|---|---|---|---|---|---|---|---|---|
| 27 | 49 | 64 | 82 | 95 | 103 | 109 | 116 | |
| Hours to Depletion | 67.5 | 37 | 28 | 22 | 19 | 17.5 | 16.5 | 15.5 |
Getting started[edit]
Each ![]() Drill requires
Drill requires ![]() 10Scarlet Bar and
10Scarlet Bar and ![]() 10Iron Bar to craft, at the
10Iron Bar to craft, at the ![]() Automation Table. That is itself crafted at the
Automation Table. That is itself crafted at the ![]() Tin Workbench. So you will first need to manually mine enough Scarlet from Azeos' Wilderness, before making your first drill. 25 + 8 + 10 = 43 scarlet minimum, needed to make the first drill.
Tin Workbench. So you will first need to manually mine enough Scarlet from Azeos' Wilderness, before making your first drill. 25 + 8 + 10 = 43 scarlet minimum, needed to make the first drill.
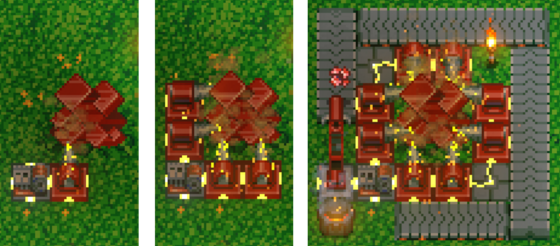
Priority should probably then be given to mining Scarlet boulders, to make more drills and increase production rate. Assuming one has easier, more plentiful access to Iron.
There are diminishing returns with the rate of ore production, from adding more drills to the same boulder. So, if you are very limited for drills, it may be faster to spread them out between different boulders.
One can collect raw ore from the drills directly (left and middle image), or use a more complex setup (right) to automate processing the ore into bars, ready for crafting. This is mostly a matter of preference. But automated processing means carrying more inventory items around, when setting up drilling sites.
Note: if you're not collecting periodically, your smelter/furnace output could fill up to 999, and stop. So, you'll need to add a second robot arm to unload finished metal bars from the smelter, into a chest.
The Wilderness is infinite in size, with every type of boulder below Octarine available, so one should never run out of ore.
Tips[edit]
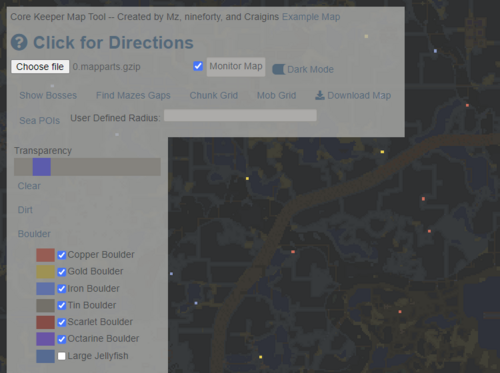
- Use Map Tool, like so, to highlight the location of boulders you've previous discovered. (Note that this will also spuriously highlight 2x2 patches of ore in walls.)
- For automated setups, laying the Conveyor Belts backwards, from the end, avoids the need to re-orient multiple tiles of it.
- Leave a one tile gap at the end, for the Robot Arm to pick up from. If an item is deposited right up onto its base, it can't pick it up.
- Using 2 Electricity Generators, in opposite corners, can negate the need to carry any Electrical Wire. A trivial additional expense, after several different bolder types have been mined.
- Boulder mining, and other automation stops running on dedicated servers when there are no players connected.
History[edit]
- Version 0.5.0.0 - Galaxite boulder added with The Desert of Beginnings.
- Version 0.4.3 - Boulders can now be destroyed by Ghorm running over them.
- Version 0.4.0 - Prior to this Sunken Sea update, boulders only produced 900 ore, maximum. And this would reduce to 450 ore with 8 drills. A behaviour unintended by the developers.
- Version 0.3.3 - The color of ore boulders has been made easier to see on the map.
