Malugaz the Corrupted
| Malugaz the Corrupted | |
|---|---|

| |
| Locations | The Forgotten Ruins |
| Scanner | |
| Aggressive | Yes |
| Faction | Caveling |
| Health | 14,513 |
| Pre-spawned | No |
| Summon item | |
Malugaz the Corrupted is one of the three early game bosses required to be defeated in order to lift The Great Wall. When defeated, Malugaz will drop ![]() Stolen Crystal Heart, one of the three items required to power up The Core. Once emplaced in its Boss Statue, the world save file is marked with this item icon.
Stolen Crystal Heart, one of the three items required to power up The Core. Once emplaced in its Boss Statue, the world save file is marked with this item icon.
Spawn[edit]
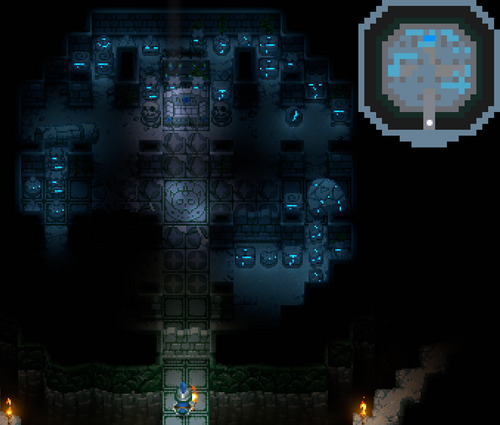
Malugaz' arena is a scene located in The Forgotten Ruins. It spawns 350 tiles away from The Core, at a random angle. That is a about 60% further out than the radius of Ghorm's track.
To spawn or respawn Malugaz, place ![]() Skull of the Corrupted Shaman on the sigil at the center of the throne room. The skull can be crafted by using
Skull of the Corrupted Shaman on the sigil at the center of the throne room. The skull can be crafted by using ![]() 3Crystal Skull Shard. Once you have three of them, use them from a hot bar slot to channel crafting. Skull shards are dropped randomly from caveling enemies in The Forgotten Ruins. Specifically those spawned on
3Crystal Skull Shard. Once you have three of them, use them from a hot bar slot to channel crafting. Skull shards are dropped randomly from caveling enemies in The Forgotten Ruins. Specifically those spawned on ![]() Stone Moss.
Stone Moss.

|
Malugaz Boss Arena (CavelingThroneRoom) |
| The Forgotten Ruins | |
| This throne room contains one |
Behavior[edit]
Malugaz has two forms. Once you defeat their first form, they will transform and restore back to full health. Players must defeat their second form to defeat Malugaz. If players move much beyond the enclosed arena, Malugaz will lose interest and return back to first form with immediately full health. This tight distance constraint is part of what makes this boss fight challenging.
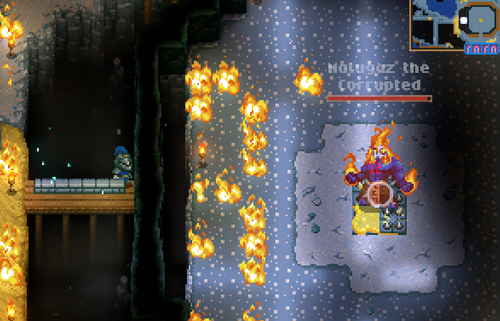
First form: Malugaz can either shoot fireball or spawn fires in random locations, first marked with a red circle. These fires can't be extinguished or removed, only disappearing after 30 seconds. In this form Malugaz can not move, except for teleporting around the arena.
Second form: Malugaz switches into a melee oriented form. They will chase players around, and then charge when in range. The charge attack creates fires around the impact location.
Passive[edit]
- Apply +16 burn damage every third sec on hit
- Immune to burning
- Immune to stun
- Immune to slippery movement
Attacks[edit]
| Type | Damage |
|---|---|
| Fireball | 152 |
| Mortar | 80 |
| Fire | 80 |
| Melee | 152 |
Drops[edit]
| Item | Chance (per roll) |
Chance (at least 1) |
|---|---|---|
| Boss chest | ||
| 1 roll | ||
| 100% | ||
| 1 roll | ||
| 18.18% | ||
| 18.18% | ||
| 9.09% | ||
| 9.09% | ||
| 9.09% | ||
| 9.09% | ||
| 9.09% | ||
| 9.09% | ||
| 9.09% | ||
| 5 rolls | ||
| 12.34% | 48.23% | |
| 15.7% | 57.43% | |
| 18.69% | 64.46% | |
| 3.74% | 17.35% | |
| 3.74% | 17.35% | |
| 1.87% | 9% | |
| 3.74% | 17.35% | |
| 3.74% | 17.35% | |
| 1.87% | 9% | |
| 2.24% | 10.72% | |
| 1.12% | 5.48% | |
| 1.12% | 5.48% | |
| 1.12% | 5.48% | |
| 3.93% | 18.14% | |
| 2.99% | 14.09% | |
| 1.87% | 9% | |
| 0.75% | 3.68% | |
| 0.75% | 3.68% | |
| 3.74% | 17.35% | |
| 3.74% | 17.35% | |
| 1.87% | 9% | |
| 1.87% | 9% | |
| 1.87% | 9% | |
| 1.87% | 9% | |
| 1.87% | 9% | |
| 1.87% | 9% | |
Strategy[edit]
Recommended Gear[edit]
- Equipment: Scarlet equipment or higher
- Accessories: Boss damage reduction, armor boost, or health-related boost
- Off-hand:
 Swift Feather or a shield
 - Food: Boss damage reduction, armor boost, or health-related cooked food (e.g.
 Carrock +
  Heart Berry)
 - Consumables: Bring at least 30
 Healing Potion and ideally a dozen
  Stoneskin Potions too
Preparation[edit]
Prepare the arena by cleaning up all objects in the throne room. You can make the arena bigger by destroying the inner Stone Blocks, but the outer-most layer is an unbreakable Obsidian Block.
Fight[edit]
First form: Wait until Malugaz attacks. Avoid the fireball or fire circles and then keep attacking them for around 2 seconds, then move around to avoid the next attack. The longer this fight goes on, the more fires will appear in the arena, and harder for you to avoid its attack without running into fires.
Second form: Avoid or shield its charge attack, and then you'll have a few seconds opening to attack before they start to chase you again. If you are low on health, run around the arena avoiding Malugaz or the fires while chugging potions. If it can't catch you, it will not use its charge attack, and you can use that to wait until the rest of the fires go out.
Cheese Method 1[edit]

Like most other bosses, Malugaz has a dead zone where players can avoid direct aggro and not have them reset the fight. The Obsidian walls of the arena make this trickier to find, but there are two. The safest is just out against the side wall.
This is a slow kill, because Malugaz' small hit-box means that only 3 Spike Traps can be utilised. One tile of the sigil must be left open for the summon. Ground Acid Slime can be added for a bonus 12 damage per second.
The ground around where player stands, outside, should be dug up to stop Malugaz teleporting out there and attacking directly. A strip on the inside might be needed too. The player stands on ground tiles with horizontal fence in them, to block random fires from being summoned.
After placing down the Skull of the Corrupted Shaman summon, immediately run as quickly as possible out of the bottom of the arena and around to the standing spot. Before Malugaz can fully spawn and teleport to you. Then wait there through both of their forms. The drop chest will be broken by the Spike Traps.
Cheese Method 2[edit]
For this strategy, a player must already have progressed through Azeos' Wilderness and optionally The Sunken Sea.
Dig up a significant proportion of the arena and connect that up to an area of water to flood it. Then jump into a Boat or Speeder directly after summoning Malugaz. This prevents any flames from spawning on the ground. So players will only need to dodge first phase fireball attacks, while chipping them down with a ranged weapon.
