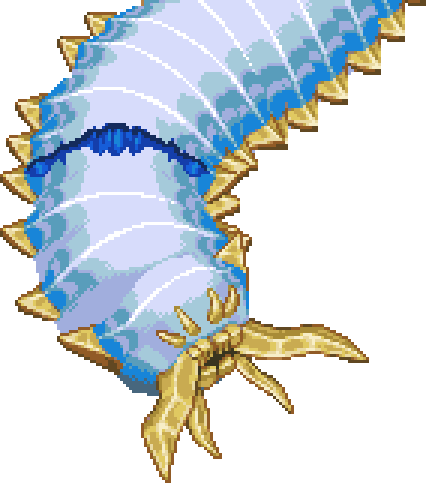
Atlantean Worm
| Atlantean Worm | |
|---|---|

| |
| Location | The Sunken Sea |
| Scanner | |
| Aggressive | Yes |
| Faction | SeaCreature |
| Health | 90,772 |
| Pre-spawned | No |
| Summon item | |
Atlantean Worm is an optional boss enemy not required to be defeated to advance game progression. It can be found in The Sunken Sea.
Behavior[edit]
It rummages waters of The Sunken Sea, and does not spawn outside of that biome. This boss can be found wandering approximately 800 - 1000 tiles from The Core; However, due to its constant movement, the ![]() Atlantean Worm Scanner is helpful in locating it.
Atlantean Worm Scanner is helpful in locating it.
While the Atlantean Worm can be seen swimming just beneath the surface of the sea, it will not attack, nor can it be attacked by, the player until it is properly summoned. When it surfaces after a player uses ![]() Bait Pillar, it will try to attack them with its mouth and spikes. Occasionally it charges an energetic attack that breaks into lots of little balls in a circle pattern. After its weakpoint is destroyed, it splits out a really short Atlantean Worm, depending on the place the weakpoint was located at.
Bait Pillar, it will try to attack them with its mouth and spikes. Occasionally it charges an energetic attack that breaks into lots of little balls in a circle pattern. After its weakpoint is destroyed, it splits out a really short Atlantean Worm, depending on the place the weakpoint was located at.
Drops[edit]
| Item | Chance (per roll) |
Chance (at least 1) |
|---|---|---|
| Boss chest | ||
| 1 roll | ||
| 100% | ||
| 1 roll | ||
| 25% | ||
| 25% | ||
| 25% | ||
| 25% | ||
| 5 rolls | ||
| 17.81% | 62.49% | |
| 10.27% | 41.84% | |
| 6.85% | 29.87% | |
| 6.85% | 29.87% | |
| 10.27% | 41.84% | |
| 6.85% | 29.87% | |
| 4.11% | 18.93% | |
| 2.74% | 12.97% | |
| 2.74% | 12.97% | |
| 16.44% | 59.26% | |
| 2.74% | 12.97% | |
| 2.74% | 12.97% | |
| 2.74% | 12.97% | |
| 1.37% | 6.66% | |
| 1.37% | 6.66% | |
| 1.37% | 6.66% | |
| 2.74% | 12.97% | |
Strategy[edit]
A good strategy is to use the Speeder with ranged weapons of choice, keeping out of it's spikes on its sides and not getting hit by its mouth while dodging electric balls when they fly out. To kill it, the player needs to destroy all the weakpoints (blue scars) and subsequent shorter versions that spawn after destroying them. As for armor, it's recommended to use armor with high dodge chance. For example:
| Item | Dodge Chance |
|---|---|
| Armor | |
| 9% | |
| 7% | |
| 7% | |
| Accessories | |
| 7% | |
| 13% | |
| 13% | |
| 10% | |
| Skills | |
| Ballanced Stance | 25% |
| Studied Patterns | 10% |
